Moment Pro Camera II (MPC II) — Best Settings Guide for Cinematic iPhone Video
Everything you need to know to shoot cinematic video with Moment Pro Camera II (MPC II) ☝️
Moment Pro Camera II has finally landed on the App Store, and it’s one of the cleanest, most intuitive, and most powerful pro-video apps available for iPhone.
Whether you’re shooting on an iPhone 15 or 16 Pro with Apple Log, or the iPhone 17 Pro with Apple Log 2, MPC II gives you full manual control, professional codecs, proper LUT support, and even a Shutter Priority mode normally reserved for dedicated cameras.
This guide walks you through the exact settings to get the best image quality possible — from codecs, colour space, and frame rate, to LUTs, focus tools, and cinematic shutter speeds. These are the same settings I use for all my iPhone filmmaking work.
Getting Started: Switching to Video Mode

After installing MPC II, the app opens in Photo Mode. Just swipe the mode picker to enter Video Mode.
The interface is built around four key areas:

- Action Plate
- Camera Controls
- Viewfinder
- Global, Camera & Hardware Settings
We’ll start with image-quality settings, because this is where the magic happens.
1. Codec: The Foundation of Image Quality
Open Camera Settings → Codec.

Best Balance (Recommended)
- HEVC
- Bitrate: High
- Chroma Subsampling: 4:2:2
HEVC 4:2:2 gives you high-quality 10-bit video, much smaller file sizes than ProRes, and plenty of latitude for colour grading.
Maximum Quality (If storage doesn't matter)
- ProRes 422
ProRes looks incredible, but the file sizes are massive. For most real-world projects, HEVC 4:2:2 is perfect.
2. Resolution: Why 4K Is Your Best Bet

Set Resolution → 4K.
Moment Pro Camera II technically supports Open Gate, but Apple currently limits Log and 10-bit recording to 1920×1440, which isn’t ideal for a pro workflow.
4K gives you the cleanest, most flexible image with full Apple Log capability.
3. Color Space: Picking the Right Log Format

Tap Color Space and choose based on your iPhone model:
- iPhone 15 / 16 Pro → Apple Log
- iPhone 17 Pro → Apple Log 2
- All other iPhones → Rec709
Why Apple Log Is the Best Choice
Apple Log and Apple Log 2 give you:
- Maximum dynamic range
- No baked-in sharpening
- No dynamic tone-mapping
- The most flexible grading experience
- Seamless LUT compatibility
If your iPhone supports Log, always shoot in Log.
4. Frame Rate: Choose 24fps for the Film Look

Set your Frame Rate → 24fps.
24fps is the cinema standard and pairs perfectly with the 180° shutter rule we’ll cover later.
5. Global Settings: Lock Your White Balance

Go to Global Settings, then enable:
- Lock AWB on Record
This prevents mid-shot white balance shifts — one of the biggest contributors to “smartphone-looking” video.
6. Quick Actions: Essential Tools You Should Enable
Swipe left → right on the viewfinder to open Quick Actions.

Enable the following:
Stabilization
- On (unless you’re on a tripod)
Viewfinder Tools
- Thirds Grid
- Level Meter
- Clipping → On
- Highlight Zebras → 95 IRE
- Peaking → Manual / Green
- Monitors → On
Tap the histogram to toggle between waveform and audio levels.
These tools make exposure and focus far more reliable.
7. Zebras & Focus Peaking: How to See Them

One of MPC II’s quirks is that Zebras and Peaking don’t appear until needed — here’s how:
Focus Peaking
- Tap AF, adjust focus manually → Peaking auto-enables.
- Switch back to AF → Peaking auto-disables.
Zebras
- Tap your EV value.
- Increase exposure until highlights exceed 95 IRE.
- Roll exposure back until zebras disappear.
This gives you clean highlight headroom with no clipping.
8. LUTs in Moment Pro Camera II (Where MPC II Really Shines)

Log footage is intentionally flat and low-contrast — perfect for dynamic range but harder to judge exposure.
Tap the LUT button on the Action Plate.
Built-in LUTs
Under the Examples category, you can apply a Log → Rec709 LUT.
Choose between:
- Preview Only (recommended) — affects only your display
- Baked In — permanently applied to your video
I always recommend Preview Only, since it preserves full grading flexibility.
9. Importing Your Own LUTs (Apple Log, Film Looks, Epic LUTs)

Moment Pro Camera II lets you import your own LUT files.
- Go to User LUTs → +
- Navigate to your LUT folder
- Import your .cube files (33-point LUTs recommended)
After importing, tap the palette icon and set:
- Input Color Space Hint → Apple Log
- Output Color Space → Rec709
Then favourite your LUT for quick access.
This is where your footage truly transforms.
Apple Log + a good Rec709 or film LUT = cinematic gold.
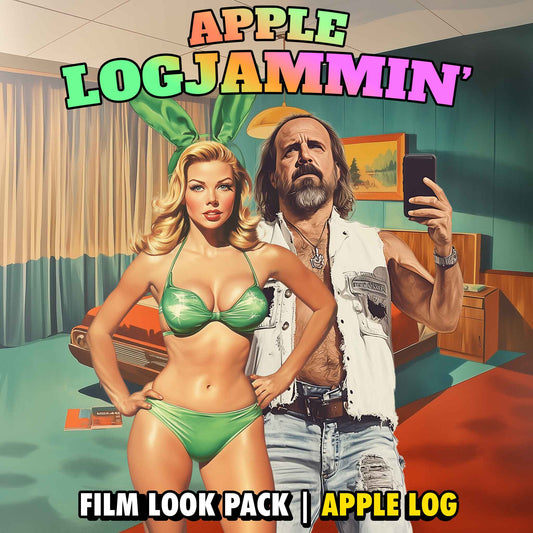
(Yes — EPIC LUTs, GLOAT, and Apple Logjammin’ all work perfectly here.)
Batch Import
You can also import entire LUT packs at once using Select All → Import.
10. Cinematic Motion Blur (The 180° Shutter Rule)

Smartphones often look “too sharp” because they default to extremely high shutter speeds.
Here’s how to fix that:
- Switch from Auto Exposure → Manual
- Set Shutter Speed → 1/48
- Adjust ISO to expose correctly
Why 1/48?
At 24fps, 1/48 follows the 180° shutter rule, giving you natural motion blur like real cinema cameras.
But there’s a problem…
In daylight, 1/48 will be way too bright — which is why you absolutely need an ND filter.
I recommend:
- Freewell Pro Hybrid Variable ND (one of the cleanest smartphone VNDs available)
Use the ND to dial exposure back until:
- Your zebras disappear
- ISO stays low (for cleaner shadows)
- Shutter remains locked at 1/48
11. Shutter Priority Mode (MPC II’s Secret Weapon)

Switch to the S icon (Shutter Priority mode).
Set your shutter to 1/48 and MPC II will automatically adjust ISO for proper exposure.
This is game-changing for:
- Vlogging
- Run-and-gun shooting
- Fast-paced outdoor filming
- Handheld work where you’re constantly moving between light sources
You still need an ND outdoors, but Shutter Priority keeps your shutter speed perfect at all times.
Final Thoughts
These are the exact settings you need to get clean, cinematic, professional video out of Moment Pro Camera II.
With the right codec, Apple Log, proper LUTs, and that 1/48 shutter locked in, your iPhone can deliver genuinely filmic results that rival much more expensive cameras.
If you found this helpful:
- Check out EPIC LUTs, GLOAT, and Apple Logjammin’ — they work beautifully with MPC II.
- Grab a solid ND filter (like the Freewell mentioned above) to unlock true cinematic motion blur.
Happy shooting, and enjoy Moment Pro Camera II — it’s genuinely one of the best pro video apps ever released for iPhone.