10 Essential Tips for Blackmagic Camera App on iOS & Android
Share
The Blackmagic Camera app is one of the most powerful pro video tools for iPhone and Android, and whether you’re a seasoned filmmaker or just getting started with mobile filmmaking, there’s always more to discover. In this guide, we’ll cover 10 essential tips and tricks to help you unlock the app’s full potential and create cinematic video with ease. Plus, we’ll show how you can make the most of Apple Log and LUTs for even better results.
1. Lock Focus and Exposure for Stable Shots

Avoid unwanted shifts in focus or exposure during filming. Simply tap anywhere on your frame to set a point of interest, then long press the reticle to lock it. This ensures your focus, ISO, and shutter speed won’t adjust unexpectedly as the scene changes. To unlock, just tap a new area of interest.
2. Swipe to Hide the Interface for Clean Framing

If the interface feels too busy while setting up your shot, swipe up to hide it and swipe back down to reveal it. Many users find this feature invaluable for focusing on framing without distractions while still having quick access to adjustments.
3. Use the Level and Tilt Meter for Perfect Horizons

Crooked horizons are a common issue in filmmaking. Enable the Level and Tilt Meter by tapping the Monitor Controls Overlay > Grid, and activate the level meter. When the crosshairs turn blue, you know your camera is perfectly aligned.
4. Lock White Balance on Record

For fast-paced shoots where manually setting white balance isn’t practical, enable Lock White Balance on Record under Settings > Camera. Set your white balance to auto, and it will lock as soon as you hit record, preventing shifts mid-shot. This is ideal for consistency across multiple clips.
5. Dim the Screen While Recording

Filming at public events like concerts? Reduce distractions by enabling Swipe Right to Dim Screen under Settings > Camera. Once active, simply swipe right after hitting record to dim your screen without interrupting your capture.
6. Maximise Video Quality by Setting the Bitrate to Max

If you’re using H.264 or HEVC codecs and want the best quality possible, go to Settings > Codec and set the Bitrate to MAX. This will give you the most image information for colour grading and post-production adjustments.
7. Capture Stunning Timelapse

The Blackmagic Camera app doubles as a fantastic timelapse tool. Enable Timelapse Recording under Settings > Record and set your desired interval (e.g., one frame every 10 seconds). Lock your focus, exposure, and white balance before hitting record for the best results.
8. Record LUTs to Clip for Instant Film Looks

If your phone supports Apple Log, import custom LUTs under Settings > LUTs. You can enable Record LUT to Clip for instant film looks baked into your footage—perfect for fast turnarounds like social media content. For premium cinematic LUTs tailored to Apple Log, check out Epic LUTs.
9. Shoot Slow Motion with Off-Speed Recording

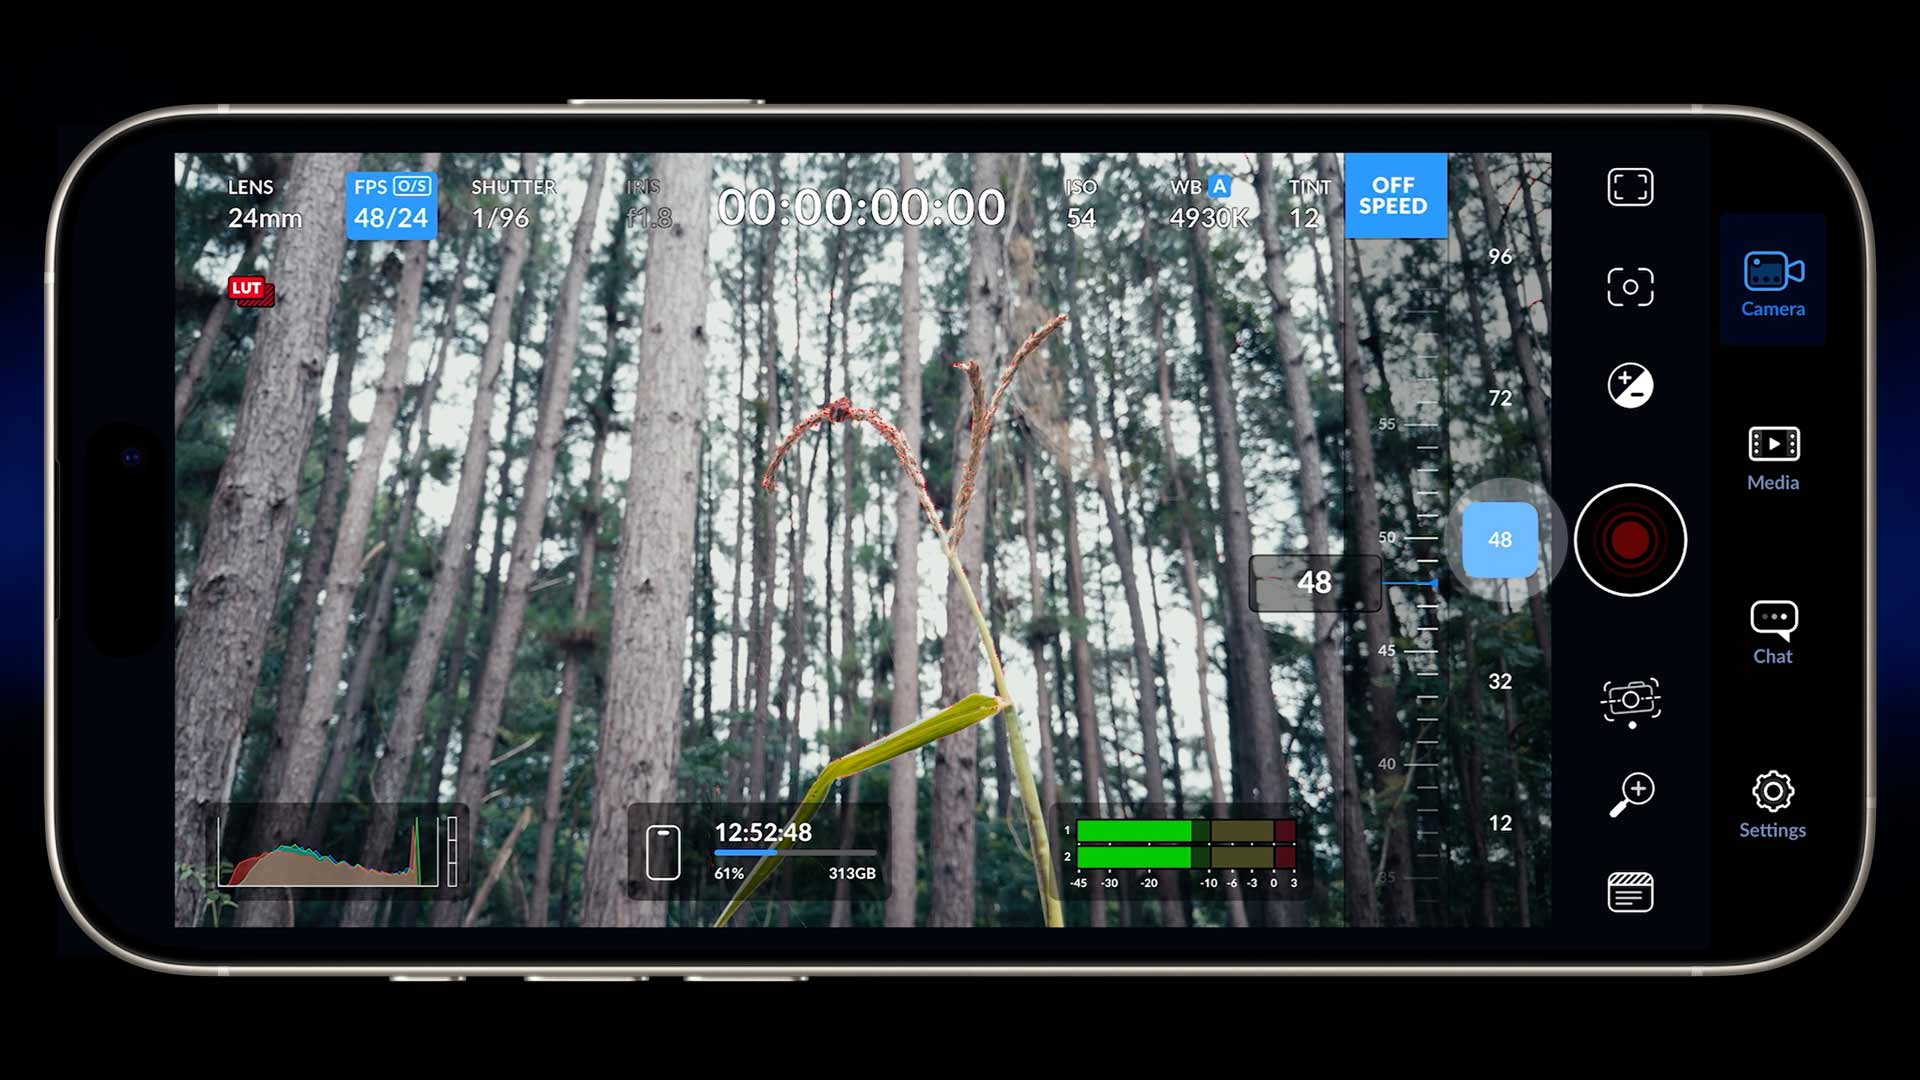
Capture smooth slow-motion footage directly in the app without needing to retime in post. Tap FPS > Off-Speed, choose a higher capture frame rate (e.g., 48fps or 96fps), and the app will retime it to your set playback frame rate (e.g., 24fps).
10. Frame for Vertical While Shooting Landscape

Planning to share on social platforms like Instagram or TikTok? Use Frame Guides under the Monitor Controls Overlay to overlay 9x16 or 4x5 aspect ratios on your landscape shot. This makes cropping for vertical platforms a breeze without compromising your composition.
Bonus Tip: Manage Media More Efficiently
Struggling to import specific clips from the Blackmagic Camera app to your computer? Use the iOS Files app to browse the Media folder and move clips to the top-level directory. This allows you to import only the files you need without dragging over the entire Media folder. For a deeper dive, check out our Media Management Tutorial.
Take Your Mobile Filmmaking to the Next Level
With these tips and tricks, you’ll get the most out of the Blackmagic Camera app and elevate your mobile filmmaking on both iPhone and Android. Whether you’re locking in perfect focus, capturing cinematic slow motion, or using our EPIC Apple Log LUTs for that professional-grade film look, this app has everything you need.
Want to create the most cinematic footage possible? Explore the best LUTs for Apple Log, including our signature Epic LUTs pack, which delivers unmatched skin tones, highlight roll-offs, and stunning filmic results.
Final Thoughts
Which of these tips was new to you? Let us know in the comments, and if this guide helped, please share it with your filmmaking community. For more tutorials and tools, visit Epic Tutorials, and don’t forget to grab your free access to our Epic LUTs Jumpstart Course for even more insights.Happy filming! 🎥


2 comments
I have followed your instructions for setting up the black magic camera app for iPhone and loaded the GLOAT lut. I recently posted a video to YouTube and it is flickering/glitching. Would you have any idea why that might be happening? Here is the link to the video: https://youtu.be/rc5neafhoXM?si=SZYUSxDV3CncUvyV
Thanks for any insight you might have,
Scott
Hello,
The link for your Variable ND Filter Cage for iPhone recommendation isn’t working for me. Could you please share it when you have a moment. Would love to support by purchasing. Love your connect. As a beginner, its easy to follow, much appreciated!
Cristina